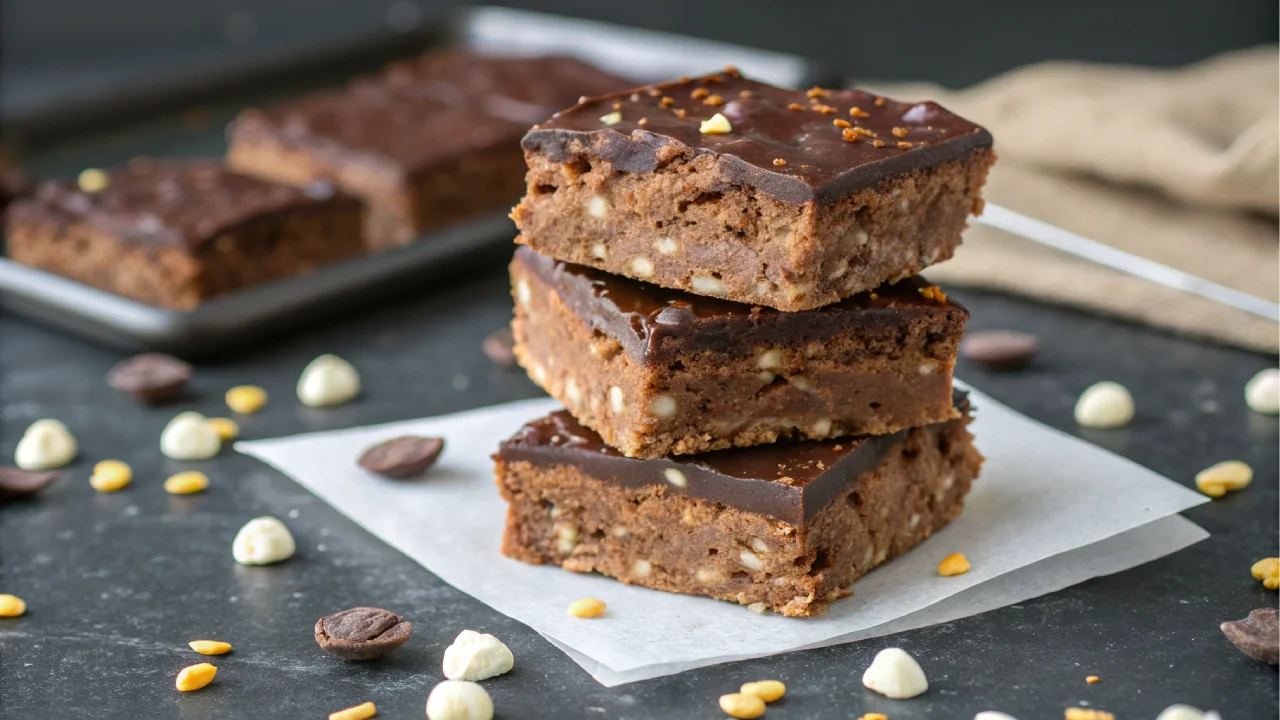
Imagine biting into a perfectly crispy, chocolate-covered Kit Kat bar, knowing it’s completely sugar-free, keto-friendly, and gluten-free. This recipe makes it possible.
We’re not just handing you a simple recipe. This is the ultimate guide for chocolate lovers on a low-carb journey. You’ll learn how to make a true copycat version with layered wafers and chocolate, plus a lightning-fast 5-minute no-bake alternative when you’re short on time. Two options, zero sugar, all the crunch.
Why This is the Only Kit Kat Recipe You’ll Ever Need
If you’ve ever missed that classic Kit Kat crunch on a sugar-free diet, you’re about to get it back without compromise. This recipe stands out for a few big reasons:
Perfectly Crispy Wafers: We’ve figured out how to recreate that iconic snap using grain-free ingredients. The secret lies in baking almond flour-based wafers and finishing them under the broiler for extra crisp.
Smooth, Rich Chocolate Coating: You’ll get that glossy, melt-in-your-mouth finish using easy tips to melt sugar-free chocolate the right way.
Two Recipes, One Post: Choose your pace. Go for the authentic layered method when you want the real deal, or whip up the 5-minute no-bake version for instant satisfaction.
Works with Your Diet: These bars are naturally keto and gluten-free. You can also tweak them to be vegan or paleo with simple ingredient swaps. This recipe isn’t just good it’s your go-to.
Ingredients Needed
For the Crispy Wafer Base
- Almond flour, finely ground for the best texture
- Baking powder, to help the wafers puff slightly
- Melted butter, unsalted and cooled slightly
- Cream cheese, softened at room temperature for smooth mixing
- Vanilla extract, to boost flavor without adding sugar
- Confectioners-style sugar substitute such as Swerve or Monk Fruit
For the Chocolate Coating and Filling
- Sugar-free baking chips such as Lily’s or ChocZero
- Coconut oil, added to thin and smooth the melted chocolate
- Almond butter or peanut butter, for a rich, creamy filling layer
Tools You’ll Need
- Silicone candy bar mold, helps shape the bars neatly
- Parchment paper, for easy rolling and clean baking
Each ingredient serves a purpose. This recipe keeps carbs low while delivering real crunch and flavor, without any added sugar.
Method 1: The Authentic Copycat Sugar-Free Kit Kat (Primary Recipe)
Step 1: Making the Crispy Keto Wafers
- Preheat your oven to 325°F. Line a baking sheet with parchment paper.
- Mix the dough by combining almond flour, baking powder, melted butter, softened cream cheese, confectioners sugar substitute, and a splash of vanilla extract in a medium bowl. Stir until a soft dough forms.
- Roll it thin between two sheets of parchment paper. Aim for a thickness of about ⅛ inch. The thinner, the crispier.
- Cut into rectangles using a sharp knife or pizza cutter. Make them roughly the size of a traditional Kit Kat finger.
- Bake for 8 to 10 minutes until lightly golden. Keep a close eye on the edges.
- Broil for the crunch: After baking, set your oven to broil. Place the wafers back in for about 60 seconds per side. Watch closely this step gives the wafers their crisp texture.
- Cool completely on a wire rack to allow them to harden.
Step 2: Creating the Fudge Filling and Assembly
- Melt a mix of sugar-free chocolate chips and a tablespoon of almond butter in a microwave-safe bowl. Heat in 20-second bursts, stirring in between, until smooth.
- Spread a thin layer of the melted mixture on one wafer. Top with another wafer and repeat until you have three layers, ending with a wafer on top.
- Lightly press the stack and chill in the fridge for 10 minutes to set.
Step 3: Coating with Tempered Chocolate
- Set up a double boiler by placing a heat-safe bowl over a pot of simmering water. Add your sugar-free chocolate chips with a spoonful of coconut oil.
- Stir constantly until the chocolate is melted and smooth. This slow, even heat prevents seizing.
- Dip each wafer stack into the melted chocolate using tongs or a fork. Let the excess drip off and place the coated bars on parchment paper.
- Chill until set in the fridge for 15 to 20 minutes.
Pro Tips from a Recipe Developer
The Secret to Ultra-Crispy Wafers:
Don’t skip the broiler step. After baking, giving each side a quick 60-second blast under the broiler transforms soft wafers into the crisp, snap-worthy texture that mimics the original Kit Kat. This step makes all the difference.
For Perfect, Clean Cuts:
To slice the bars neatly without cracking the chocolate, use a sharp kitchen knife. Dip the blade in hot water, wipe it dry, and cut with a single, firm motion. Repeat the dip-and-wipe between slices for clean, professional-looking bars every time.
Method 2: The Easy 5-Minute No-Bake Kit Kat
No time for layers? No problem. This quick version gives you that satisfying Kit Kat crunch without baking or broiling.
What You’ll Need:
- 1 cup keto granola or unsweetened puffed rice cereal
- ½ cup sugar-free chocolate chips
- 2 tablespoons almond butter or peanut butter
- 1 tablespoon coconut oil
- 1 to 2 teaspoons of your preferred powdered sweetener (optional)
How to Make It:
- Melt the chocolate: In a microwave-safe bowl, combine the chocolate chips, nut butter, and coconut oil. Microwave in 20-second intervals, stirring each time, until smooth.
- Mix in the crunch: Stir in the granola or puffed rice and optional sweetener until everything is coated evenly.
- Scoop and press: Spoon the mixture into a silicone candy bar mold or press into a parchment-lined loaf pan. Flatten with the back of a spoon.
- Chill: Place in the fridge for 30 minutes or until firm. Slice into bars if using a loaf pan.
That’s it. Just mix, chill, and enjoy your instant, sugar-free Kit Kat fix.
Serving and Storage Tips
Serving Suggestions:
Serve your homemade Kit Kat bars chilled for the best crunch. Slice them cleanly and stack them neatly on a small plate or in a paper candy cup for parties, lunchboxes, or a guilt-free dessert platter.
To Store:
Place the bars in an airtight container and keep them refrigerated. They’ll stay fresh and firm for up to two weeks. If left at room temperature too long, the chocolate may soften or melt slightly.
To Freeze:
Wrap each bar individually in parchment paper to prevent sticking, then place them in a zip-top freezer bag. Store flat in the freezer for up to three months. When ready to eat, let them thaw for a few minutes at room temperature for the perfect bite.
Helpful Notes
- Nut-Free Option: Swap almond flour for tigernut flour and use sunflower seed butter instead of almond or peanut butter to make the bars completely nut-free and allergy-friendly.
- Make it Vegan: Use dairy-free cream cheese and double-check your chocolate chips are vegan-approved, like ChocZero’s dark chocolate.
- Adjust Sweetness: Taste your chocolate mixture before coating the bars. Add a pinch of monk fruit or erythritol if you like it sweeter.
- Mold-Free Method: No silicone mold? No problem. Use a parchment-lined loaf pan and slice into bars once chilled.
- Troubleshooting Soft Wafers: If your wafers feel soft, broil them a bit longer next time and make sure they’re completely cooled before layering.
- Batch and Freeze: These bars freeze well, so consider making a double batch to always have a treat on hand.
Conclusion
You don’t have to give up your favorite chocolate treat just because you’re cutting sugar. This sugar-free Kit Kat recipe brings back everything you love crunchy layers, smooth chocolate, and serious satisfaction all while fitting perfectly into keto, gluten-free, and low-carb lifestyles.
Whether you go for the authentic, layered copycat or the fast no-bake version, both deliver on flavor and texture. The best part? You control the ingredients, sweetness, and dietary tweaks.
Tried this recipe? Leave a comment and star rating below. We’d love to hear how it turned out.
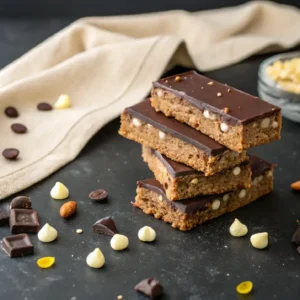
Sugar-Free Keto Kit Kat Bars (2 Ways)
Ingredients
Crispy Wafer Base
- 1 cup almond flour finely ground
- 1 tsp baking powder
- 2 tbsp unsalted butter melted and cooled
- 2 tbsp cream cheese softened
- 1 tsp vanilla extract
- 2 tbsp confectioners-style sugar substitute like Swerve or Monk Fruit
Chocolate Coating and Filling
- 1 cup sugar-free chocolate chips such as Lily’s or ChocZero
- 1 tbsp coconut oil
- 2 tbsp almond butter or peanut butter
Instructions
- Step 1: Making the Crispy Keto WafersPreheat oven to 325°F (163°C) and line a baking sheet with parchment paper. Mix almond flour, baking powder, butter, cream cheese, sweetener, and vanilla until a soft dough forms. Roll dough thin (⅛ inch) between parchment sheets. Cut into rectangles. Bake 8–10 minutes until golden. Broil for 60 seconds per side for crisp. Cool on wire rack.
- Step 2: Fudge Filling and AssemblyMelt sugar-free chocolate chips with almond butter in microwave-safe bowl, stirring every 20 seconds until smooth. Spread a thin layer on one wafer, stack with another, repeat for three layers. Chill for 10 minutes.
- Step 3: Coating with ChocolateMelt chocolate chips and coconut oil over double boiler, stirring until smooth. Dip wafer stacks in chocolate, let excess drip off. Place on parchment paper and chill for 15–20 minutes until set.
- Optional Quick No-Bake Method:Melt ½ cup chocolate chips, 2 tbsp almond butter, and 1 tbsp coconut oil in microwave. Stir in 1 cup keto granola or puffed rice and optional sweetener. Press into mold or loaf pan. Chill 30 minutes before slicing.
Notes
- Calories: 149 kcal
- Carbohydrates: 4 g
- Net Carbs: 2 g
- Protein: 7 g
- Fat: 12 g
- Fiber: 2 g
- Vitamin A: 300 IU
- Vitamin C: 4.1 mg
- Calcium: 40 mg
- Iron: 1.1 mg
More healthy desserts to try
Sugar Free Keto Lemon Meringue Pie
healthy high protein collagen cookies
Leave a Reply